Setup (iOS)
Create a project with react-native init $PROJECT_NAME$
Project Initialization
It is recommended to use Cocoapods - many native libraries on iOS are dependant on it. Cocoapods is the primary dependencies manager for iOS (like npm for web)
- Inside project’s root, run
cd ios && pod init- it creates aPodfile, and/Podsfolder. - Replace Podfile’s content with (don’t forget to change project’s name):
## !! CHANGE THE PROJECT NAME TO YOUR PROJECT'S !! ##
target ${PROJECT_NAME} do
  platform :ios, '9.0'

  # Your 'node_modules' directory is probably in the root of your project,
  # but if not, adjust the `:path` accordingly
  pod 'React', :path => '../node_modules/react-native', :subspecs => [
    'Core',
    'CxxBridge', # Include this for RN >= 0.47
    'DevSupport', # Include this to enable In-App Devmenu if RN >= 0.43
    'RCTText',
    'RCTNetwork',
    'RCTWebSocket', # Needed for debugging
    'RCTAnimation', # Needed for FlatList and animations running on native UI thread
    # Add any other subspecs you want to use in your project
  ]
  pod 'yoga', :path => '../node_modules/react-native/ReactCommon/yoga'
  pod 'DoubleConversion', :podspec => '../node_modules/react-native/third-party-podspecs/DoubleConversion.podspec'
  pod 'glog', :podspec => '../node_modules/react-native/third-party-podspecs/glog.podspec'
  pod 'Folly', :podspec => '../node_modules/react-native/third-party-podspecs/Folly.podspec'
end

# Fixes an issue that happens with Xcode > 9: https://github.com/facebook/react-native/issues/20492
post_install do |installer|
  installer.pods_project.targets.each do |target|

    # The following is needed to ensure the "archive" step works in XCode.
    # It removes React & Yoga from the Pods project, as it is already included in the main project.
    # Without this, you'd see errors when you archive like:
    # "Multiple commands produce ... libReact.a"
    # "Multiple commands produce ... libyoga.a"

    targets_to_ignore = %w(React yoga)

    if targets_to_ignore.include? target.name
      target.remove_from_project
    end

  end
end
- Run
pod installin same folder - Most of RN’s 3rd party libraries, that use native code, support Pods. After some time, your Podfile will look something like this
- From this point, every time you install a 3rd party native library, after running
react-native link, you need to runpod installagain to update you project
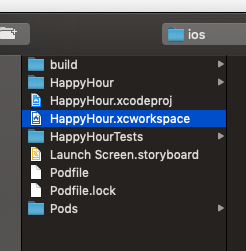
After initializing the Podfile & installing Pods, when opening the project in Xcode, you'll be opening your project from ios/YourProject.xcworkspace instead of ios/YourProject.xcodeproj:
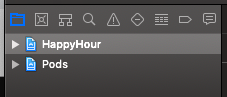
You'll see that your project now contains both your initial project AND Pods libraries
Scheme
An Xcode scheme defines a collection of targets to build, a configuration to use when building, and a collection of tests to execute.
On RN project initialization, there's only 1 scheme, which is used to build apps in debug mode. We need to create another scheme, which will be used to create an app in release mode.

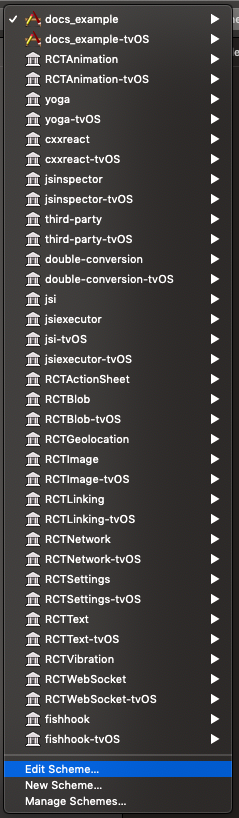
- Open the schemes list, and select 'Edit':
- Duplicate the current scheme, give it a new name ('$PROJECT NAME$ - Release', for example):
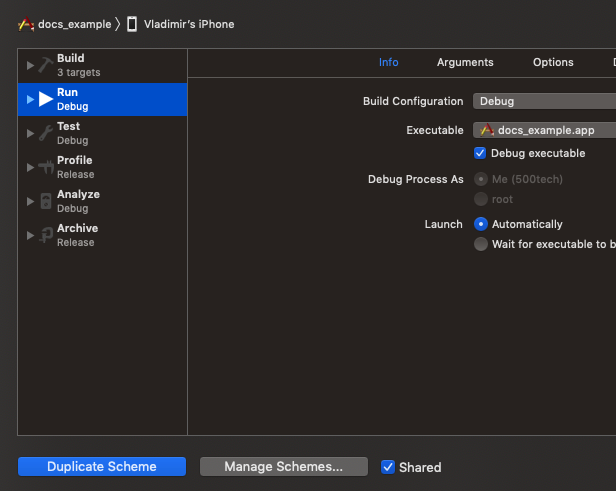
- In 'Run' tab, select 'Release':

Now you can run the app in Release mode, without archiving it for production. This is a good way to check your app just before distributing it.
To run a specific scheme, use react-native run-ios --scheme"$SCHEME NAME$"
Simulators
Running react-native run-ios will automatically open a simulator. It's always good to test your app on number of simulator, as different iPhones have different resolutions & the newer ones have a notch on their screen.
To run a specific simulator, use react-native run-ios --simulator="iPhone XS Max" (iPhone 5, iPhone 8, iPhone XR...)